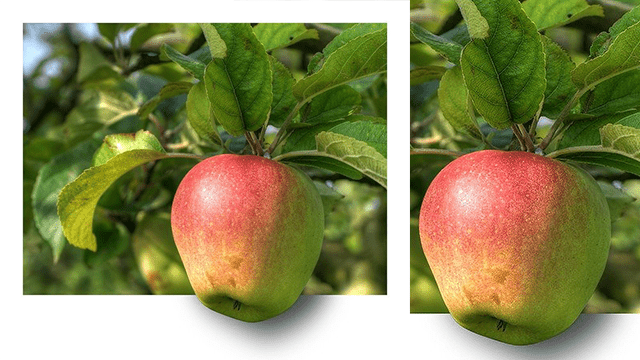
Sometimes the composition does not work well and you want to enlarge a subject considerably. Or the lens simply wasn’t long enough. That often happens, you can plan your shoot, but you must of course also be able to respond to unexpected gems. Moreover, you can crop a photo afterwards, but a high magnification can be accompanied by a considerable loss of quality. We can help you with that!
Cropping is the most obvious way to get closer to the subject. But it comes at the expense of resolution. There are different techniques to upscale image both online and offline. Both methods are handy but offline needs little photo editing knowledge and handling with photo editing software. But, on the other hand, the online method is simpler and easier. In the below few minutes read we will about both methods in detail. With these techniques, you can get enlarge images without losing details.
Online Method
The online method is handy and super easy. You just need to upload your image to imageupscaler.com and can get better results in just a few mouse clicks. The Image Upscaler is a free trusted online web base software that processes your image and upscales it according to your needs. You can create attractive thumbnails for your YouTube videos, blog post featured images, and save the precious moment of photo memories. It’s an AI-based online software that enlarges images up to 4X zoom without losing details, giving shine to your memories. Image upscale scan the uploaded image, detect the subject automatically and enhance the pixel density as per colour requirements. You can enlarge up to 10 images for free without creating an account.
The best part of online methods is that you don’t need any photo editing skills. You does need to learn the complex software editing options. While in the case of Photoshop you must have to be familiar with photoshop tools.
Offline Method
The offline method is based on the Adobe Photoshop image editing process. Open the photo in Photoshop and select the whole photo by pressing Ctrl + A, then press Ctrl + T to switch to Free Transform. Drag the corners out to enlarge the image. Keep Shift pressed to keep the aspect ratio the same and prevent distortion. Do not go for an enlargement of more than 160%, as the results will quickly become unnatural. Make your composition the way you want it and press Ctrl + D when you are satisfied.
Make a detailed selection
Now some noise reduction and sharpening are needed. Grab the polygon lasso tool and enlarge your image so you can work neatly. Now make a selection by carefully clicking around your subject. Set the Feather to 0px in the options. When the selection is complete, you will see the moving dotted line around the subject. With the Shift pressed you can add to the selection, with the Alt you can remove something. In the tool options, click on Select and Mask (or Refine Edges). Go to Edge Detection and click Smart Beam. Sets a variable width refinement area around the edge of the selection. This option is useful when your selection is a portrait that includes both hair and shoulders. In such portraits, the hair may require a greater refinement area than the shoulders, where the edge is tighter. Play with the controller until you are satisfied with the result. Set the output to New Layer with Layer Mask and click OK.
Sharpen and noise reduction
Click on the eye of the original background layer to make it visible and then click on the thumbnail of your new layer. Press Ctrl + Shift + U, your masked portion will now become completely unsaturated. That is the part that will be sharpened, go to Filter; Different; Highlights and play with the beam slider to apply the sharpening. Usually, 2-5 px works fine. Click OK and adjust the blend modes from Normal to Overlay. Back in the layer panel, make the background active again and duplicate it (Ctrl + J). We apply noise reduction to this layer. Go to Filter; Mounting; Noise reduction and set the amount to 10, details to 0% and reduce colour noise to 0%. Since you don’t want the noise reduction on the sharpened subject, drag this Layer Mask onto this one with Alt pressed.
Now you can save the photo as you want. Your subject has been enlarged considerably, but the details have not been lost.


